TurboIN User Manual
Start Using HolmesAI TurboIN
Introduction
Leveraging the computing power collected from the HolmesAI Network, HolmesAI TurboIN is a high-performance AI inference platform designed to address the challenges inherent in decentralized AI models. TurboIN effectively manages issues related to model ownership, protocol authorization, and integration, streamlining the AI inference process. By accelerating the deployment and execution of AI models, TurboIN ensures swift and accurate inference tasks. This platform not only enhances operational efficiency but also supports the rapid development and deployment of innovative AI applications, pushing the boundaries of what’s possible within the decentralized AI landscape.
Create Account
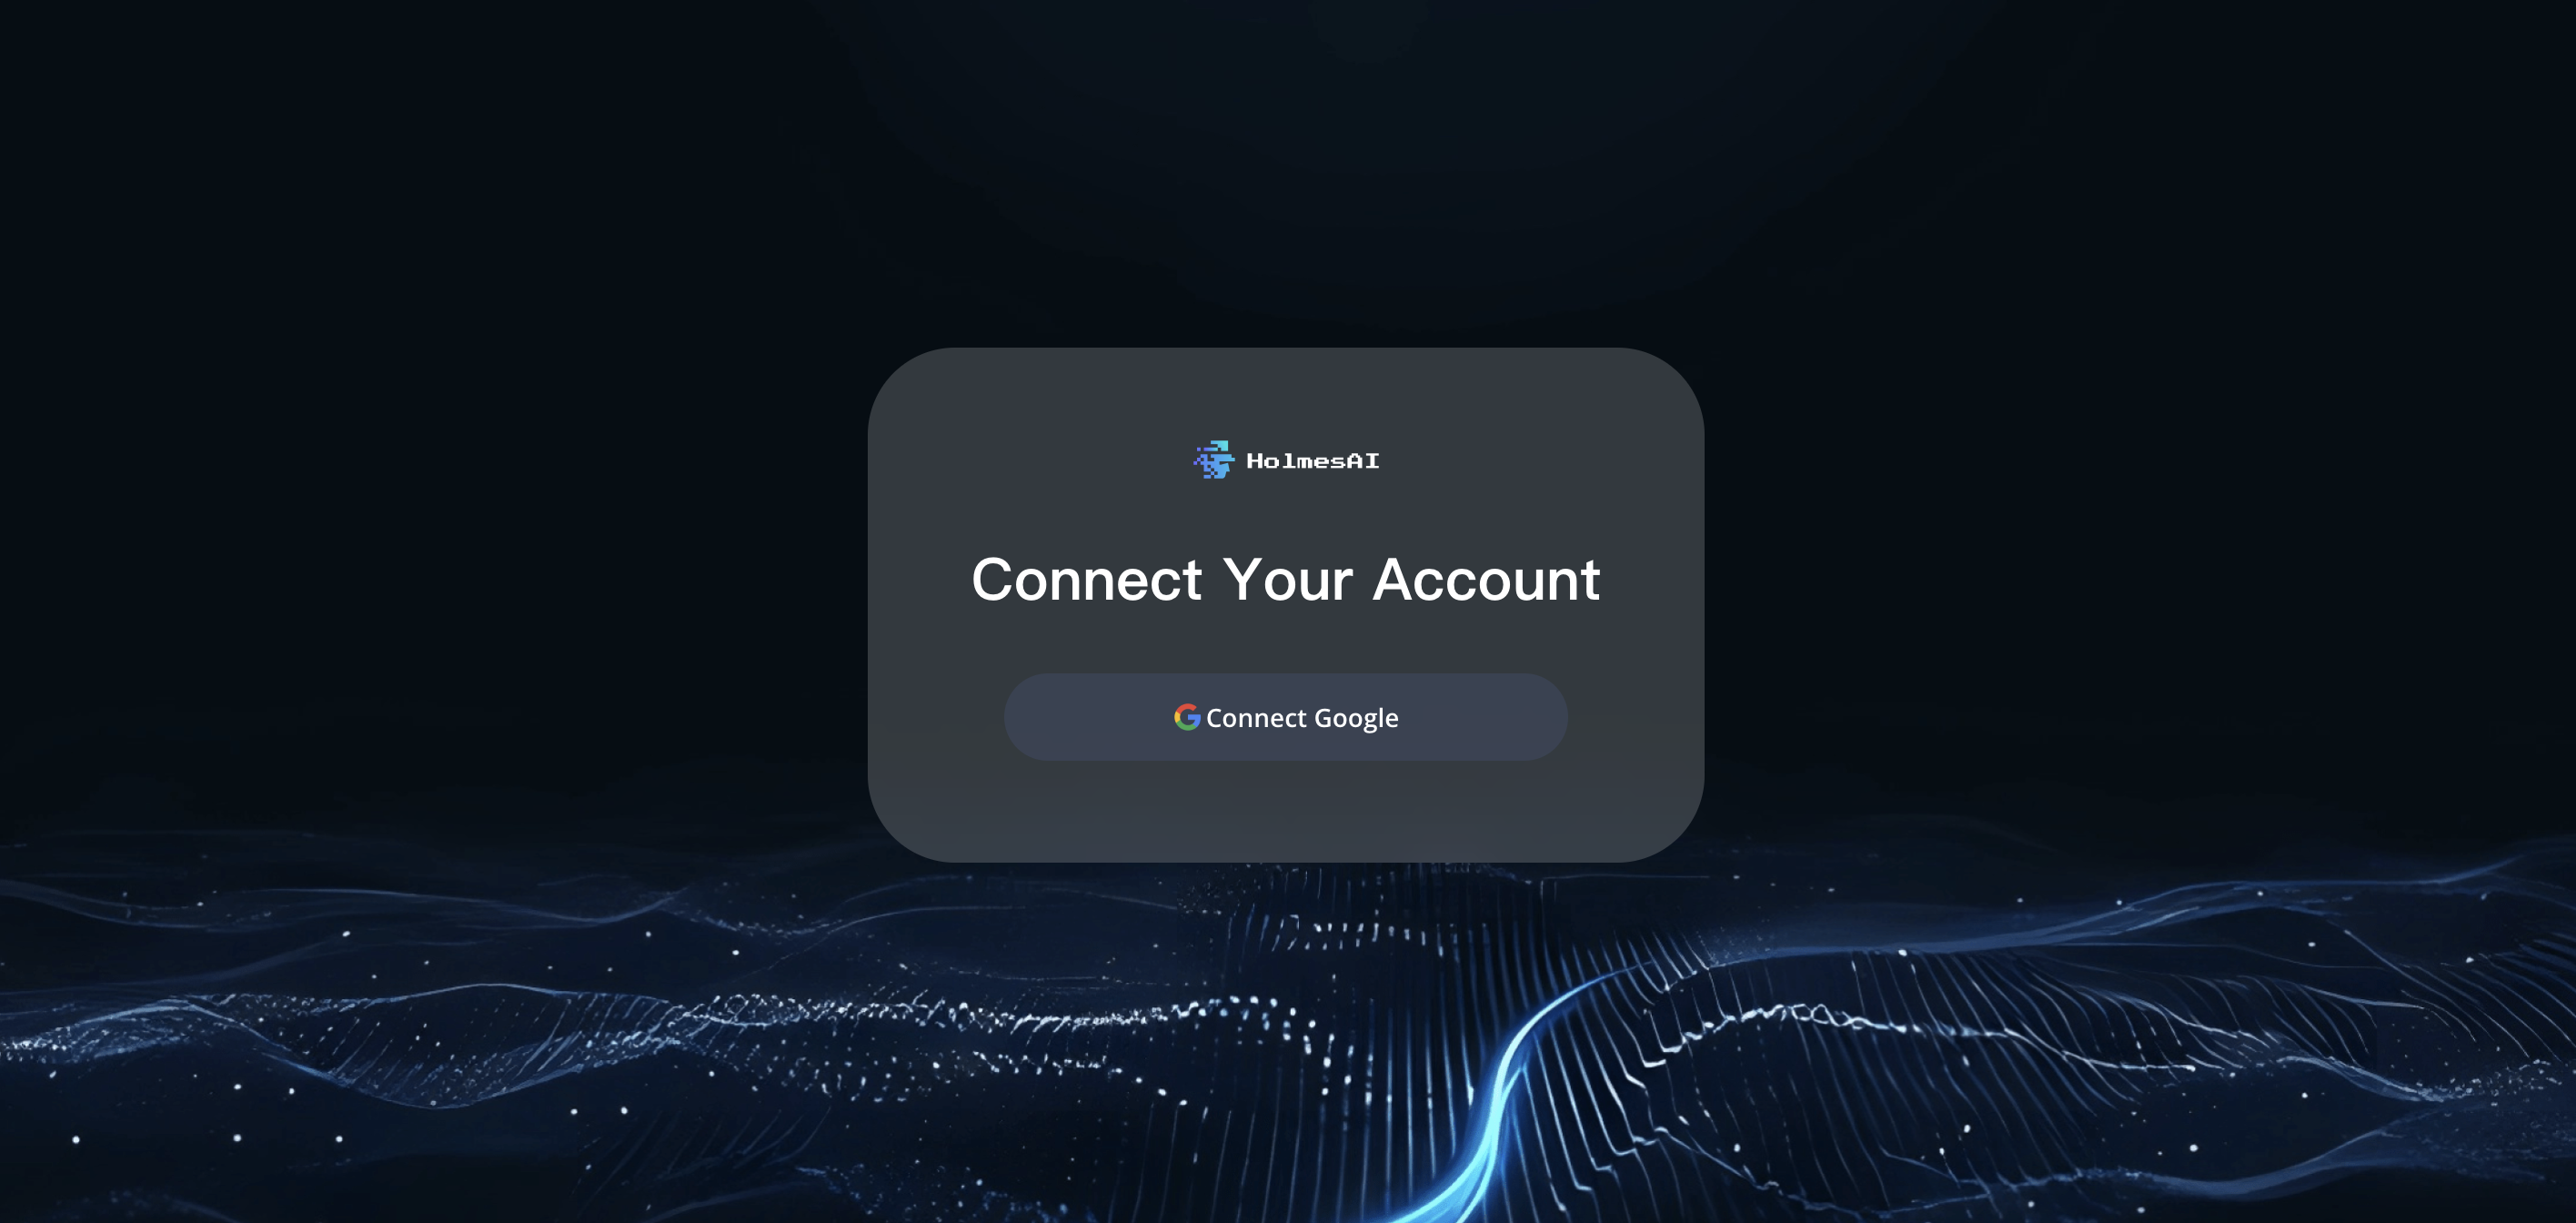
- To create an account, visit holmesai.xyz (opens in a new tab) and click on the Console button in the top right corner of the page. You will be directed to the following page where you can sign up using Google.
Check Account
-
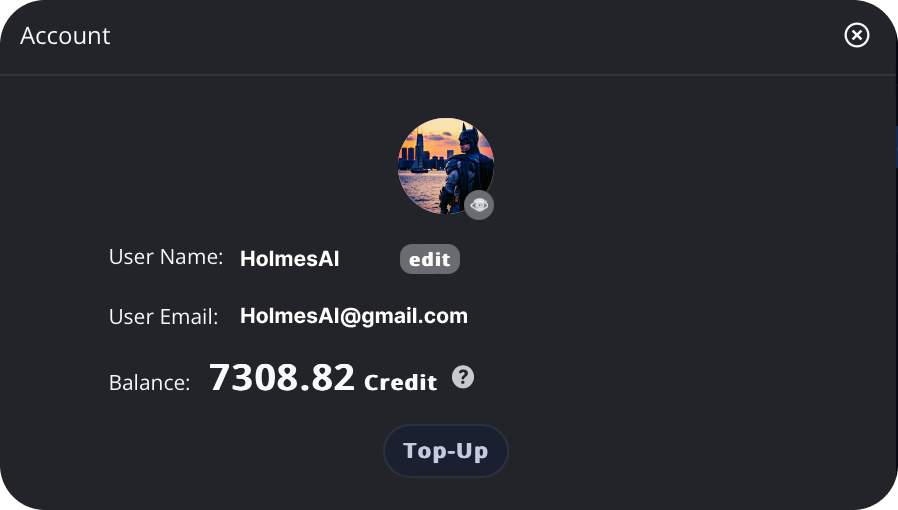
To check your account details, click the profile thumbnail in the top right corner of the page.
-
Here, you can view and edit your username.
-
To change your profile picture (generated by the AI model), click the button at the bottom right corner of the profile picture.
-
You can also view your account credits here. New users are automatically granted 10 free credits.
Create Service
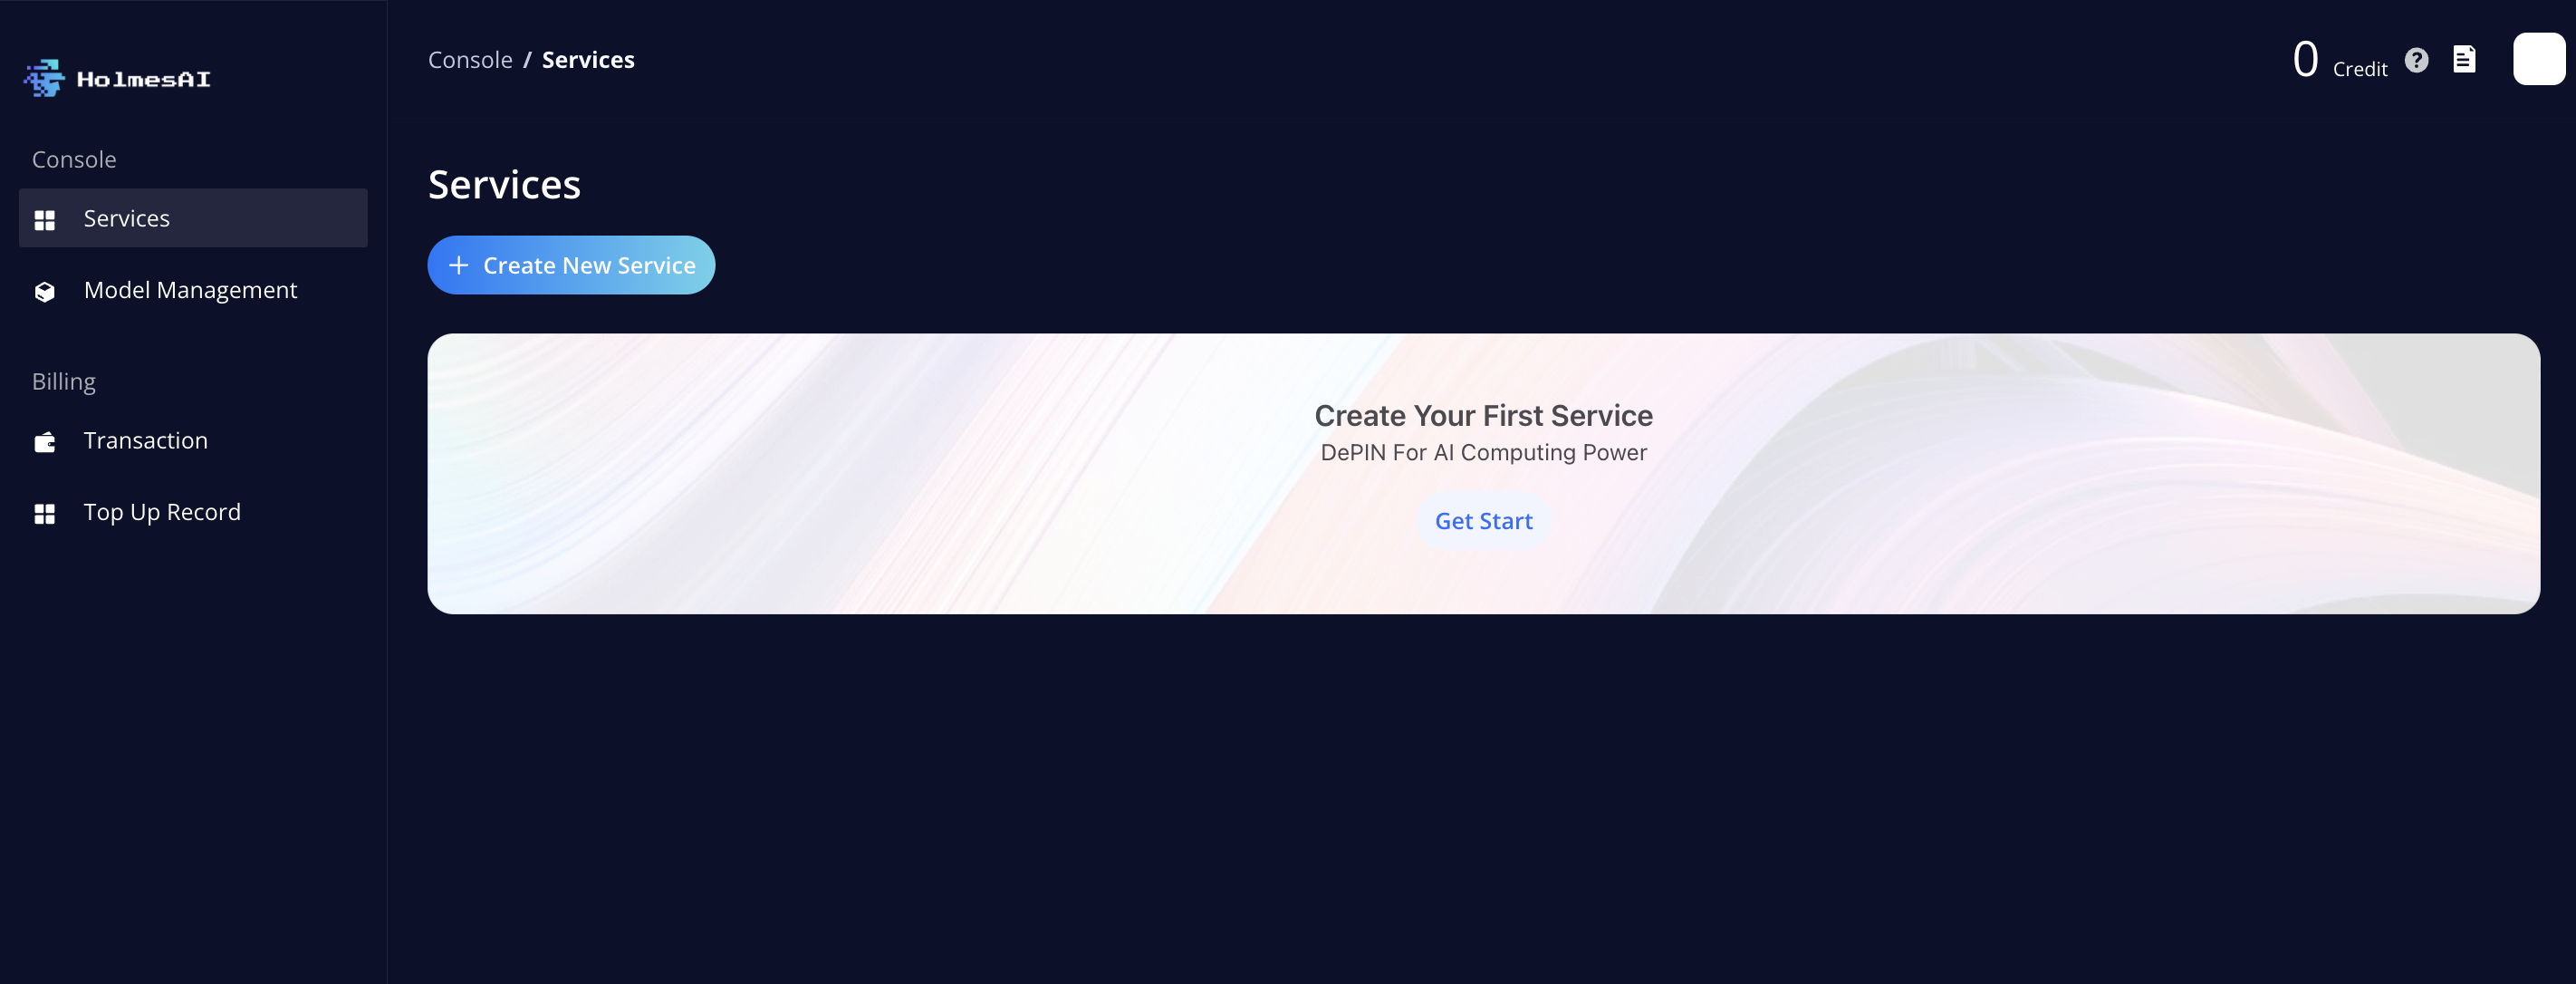
- After signing in, you will be directed to the Service Dashboard, where you can create your first service.
Step 1
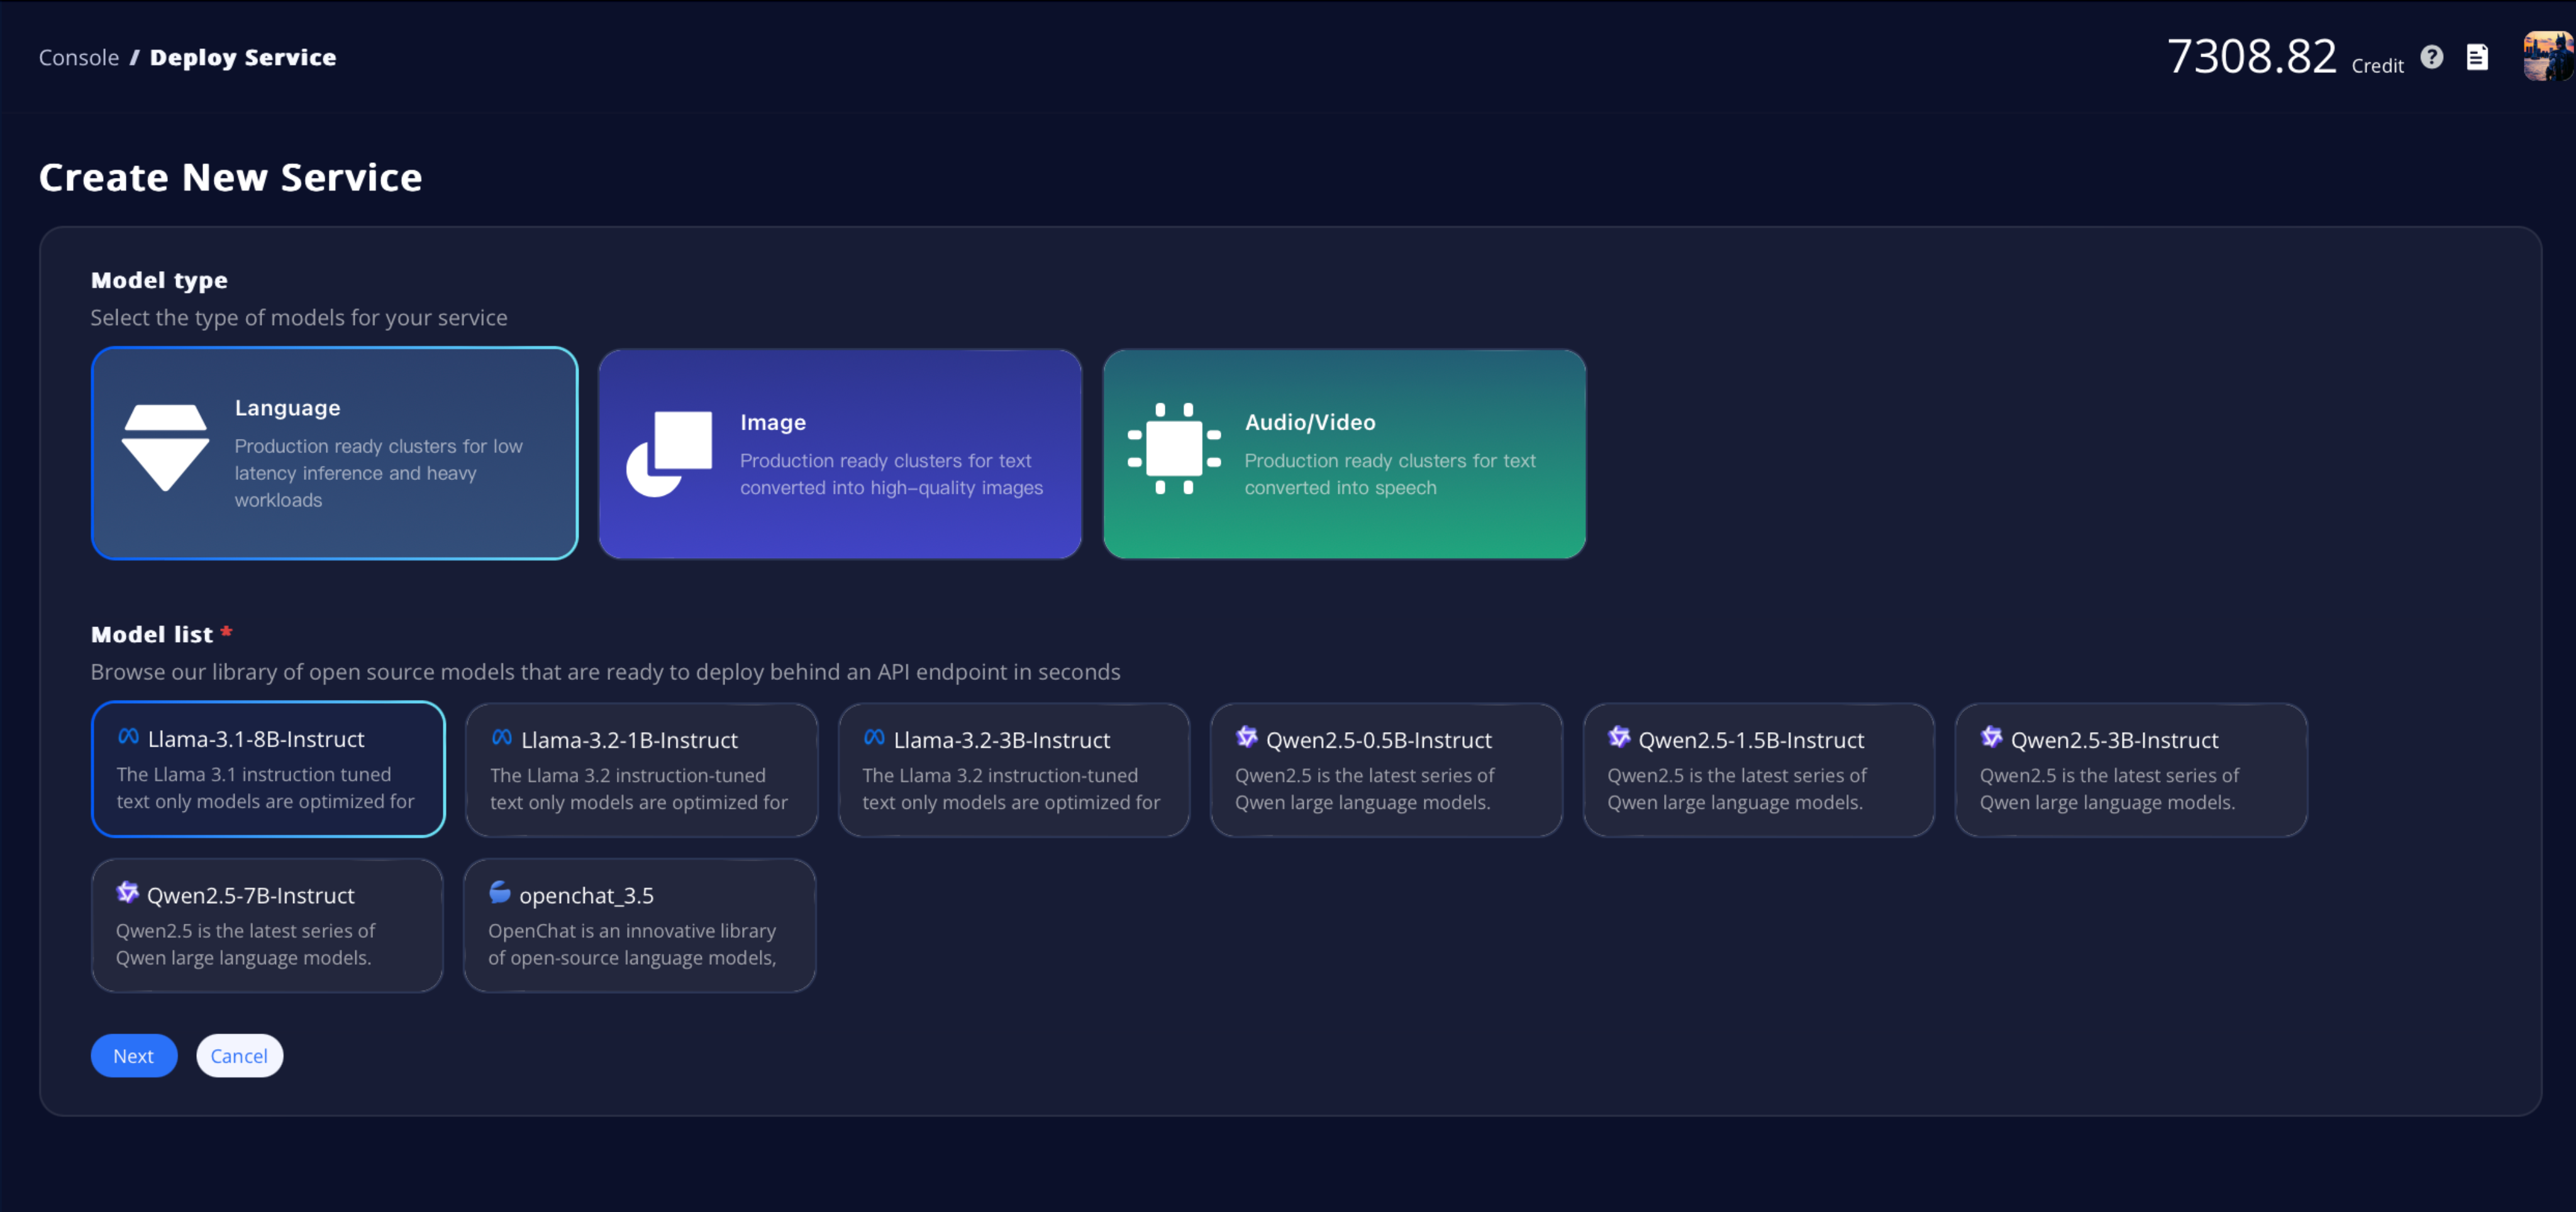
- Start by selecting the model type from the three categories based on your needs.
- The supported public models for your chosen category will be displayed under the Model List, where you can choose the specific model you want. Click Next to proceed to the next step.
Step 2
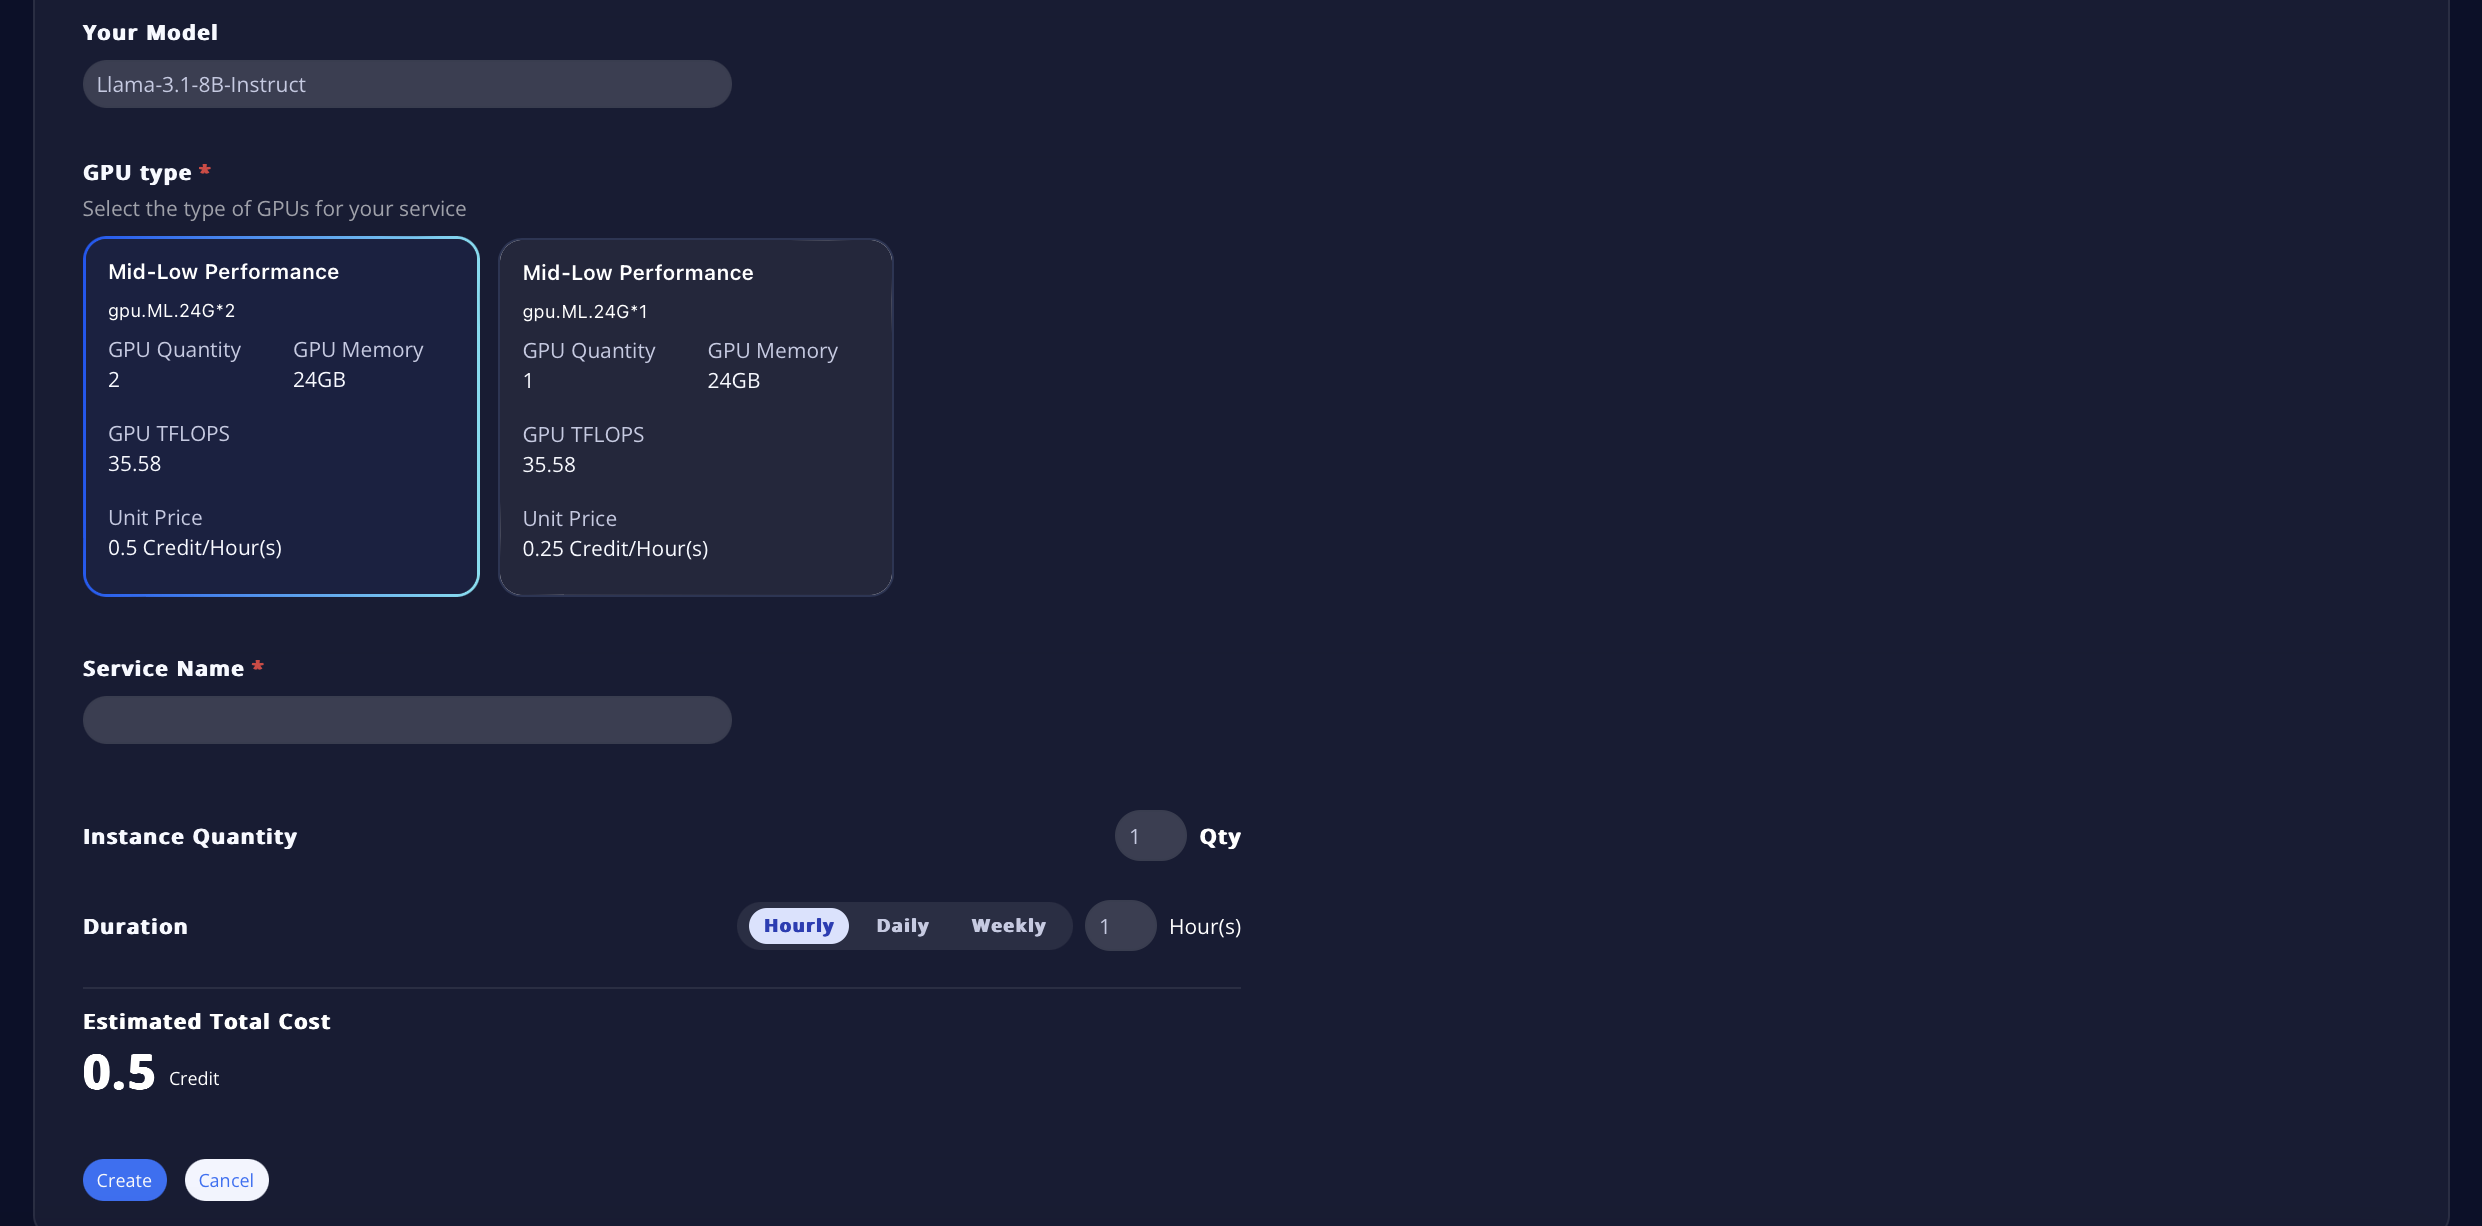
- Select the location you require. You can click on each location tab to check the availability of GPUs in each region (options will appear under GPU Type).
- Next, choose the plan that fits your requirements (more plans will be available soon).

- The model you selected in Step 1 will be displayed here to give you an idea of the types of GPUs you should select.
- There are five levels of instances for you to choose from, with the unit price listed for each performance level (pricing is based on the tagged performance level).
- You can then select the instance quantity and service duration to finalize the total charge for this service.
- Be sure to name your service so you can easily monitor it in the future.
Model Management
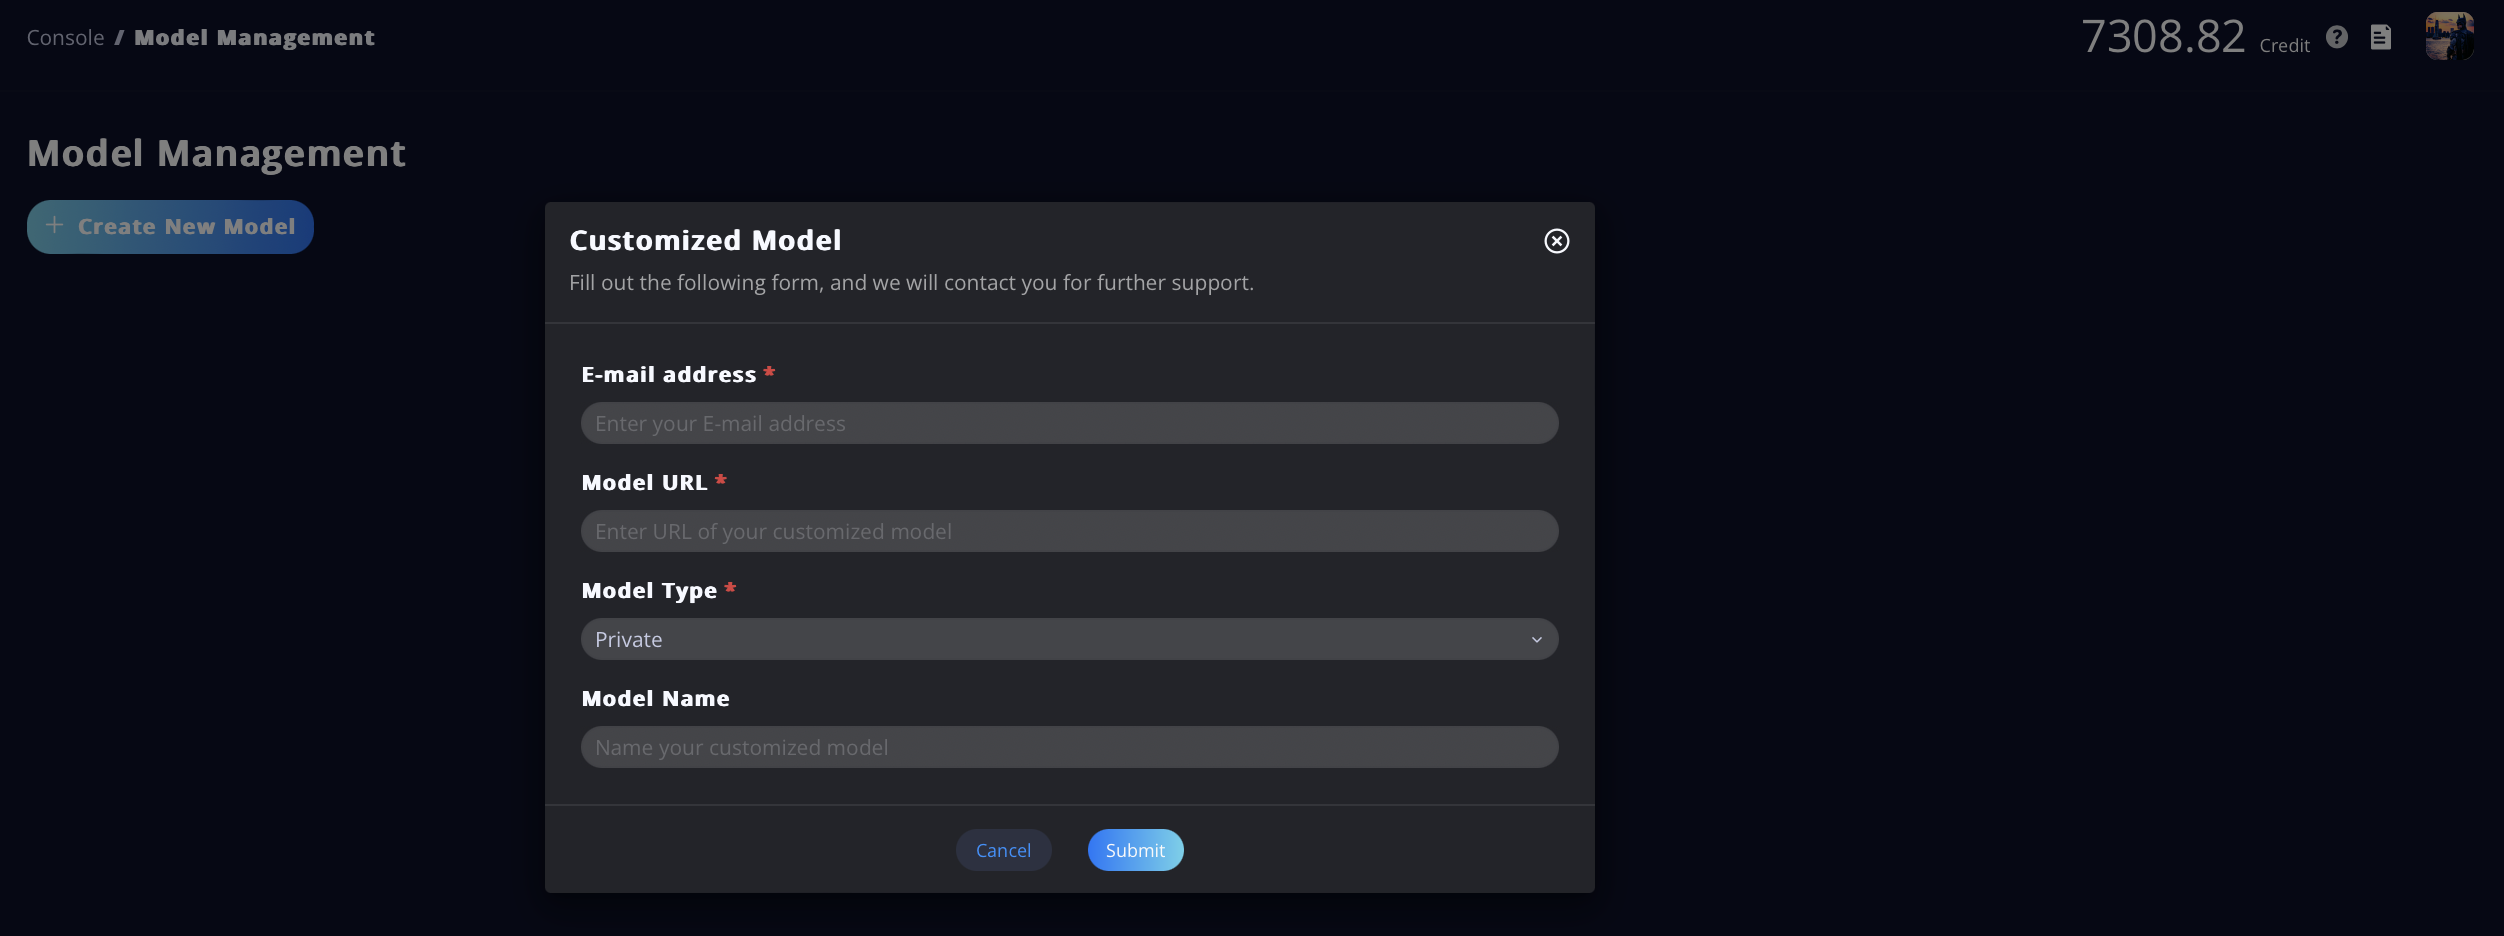
- If you want to bring in a private, customized model, we offer support for that as well!
- Click on the Model Management tab in the navigation bar, then click Create New Model. A form will pop up. Fill out the form, and we will contact you for further support. Once your private model is confirmed to be compatible with our platform, it will appear in the Model List in Step 1.
Monitor Service
Dashboard
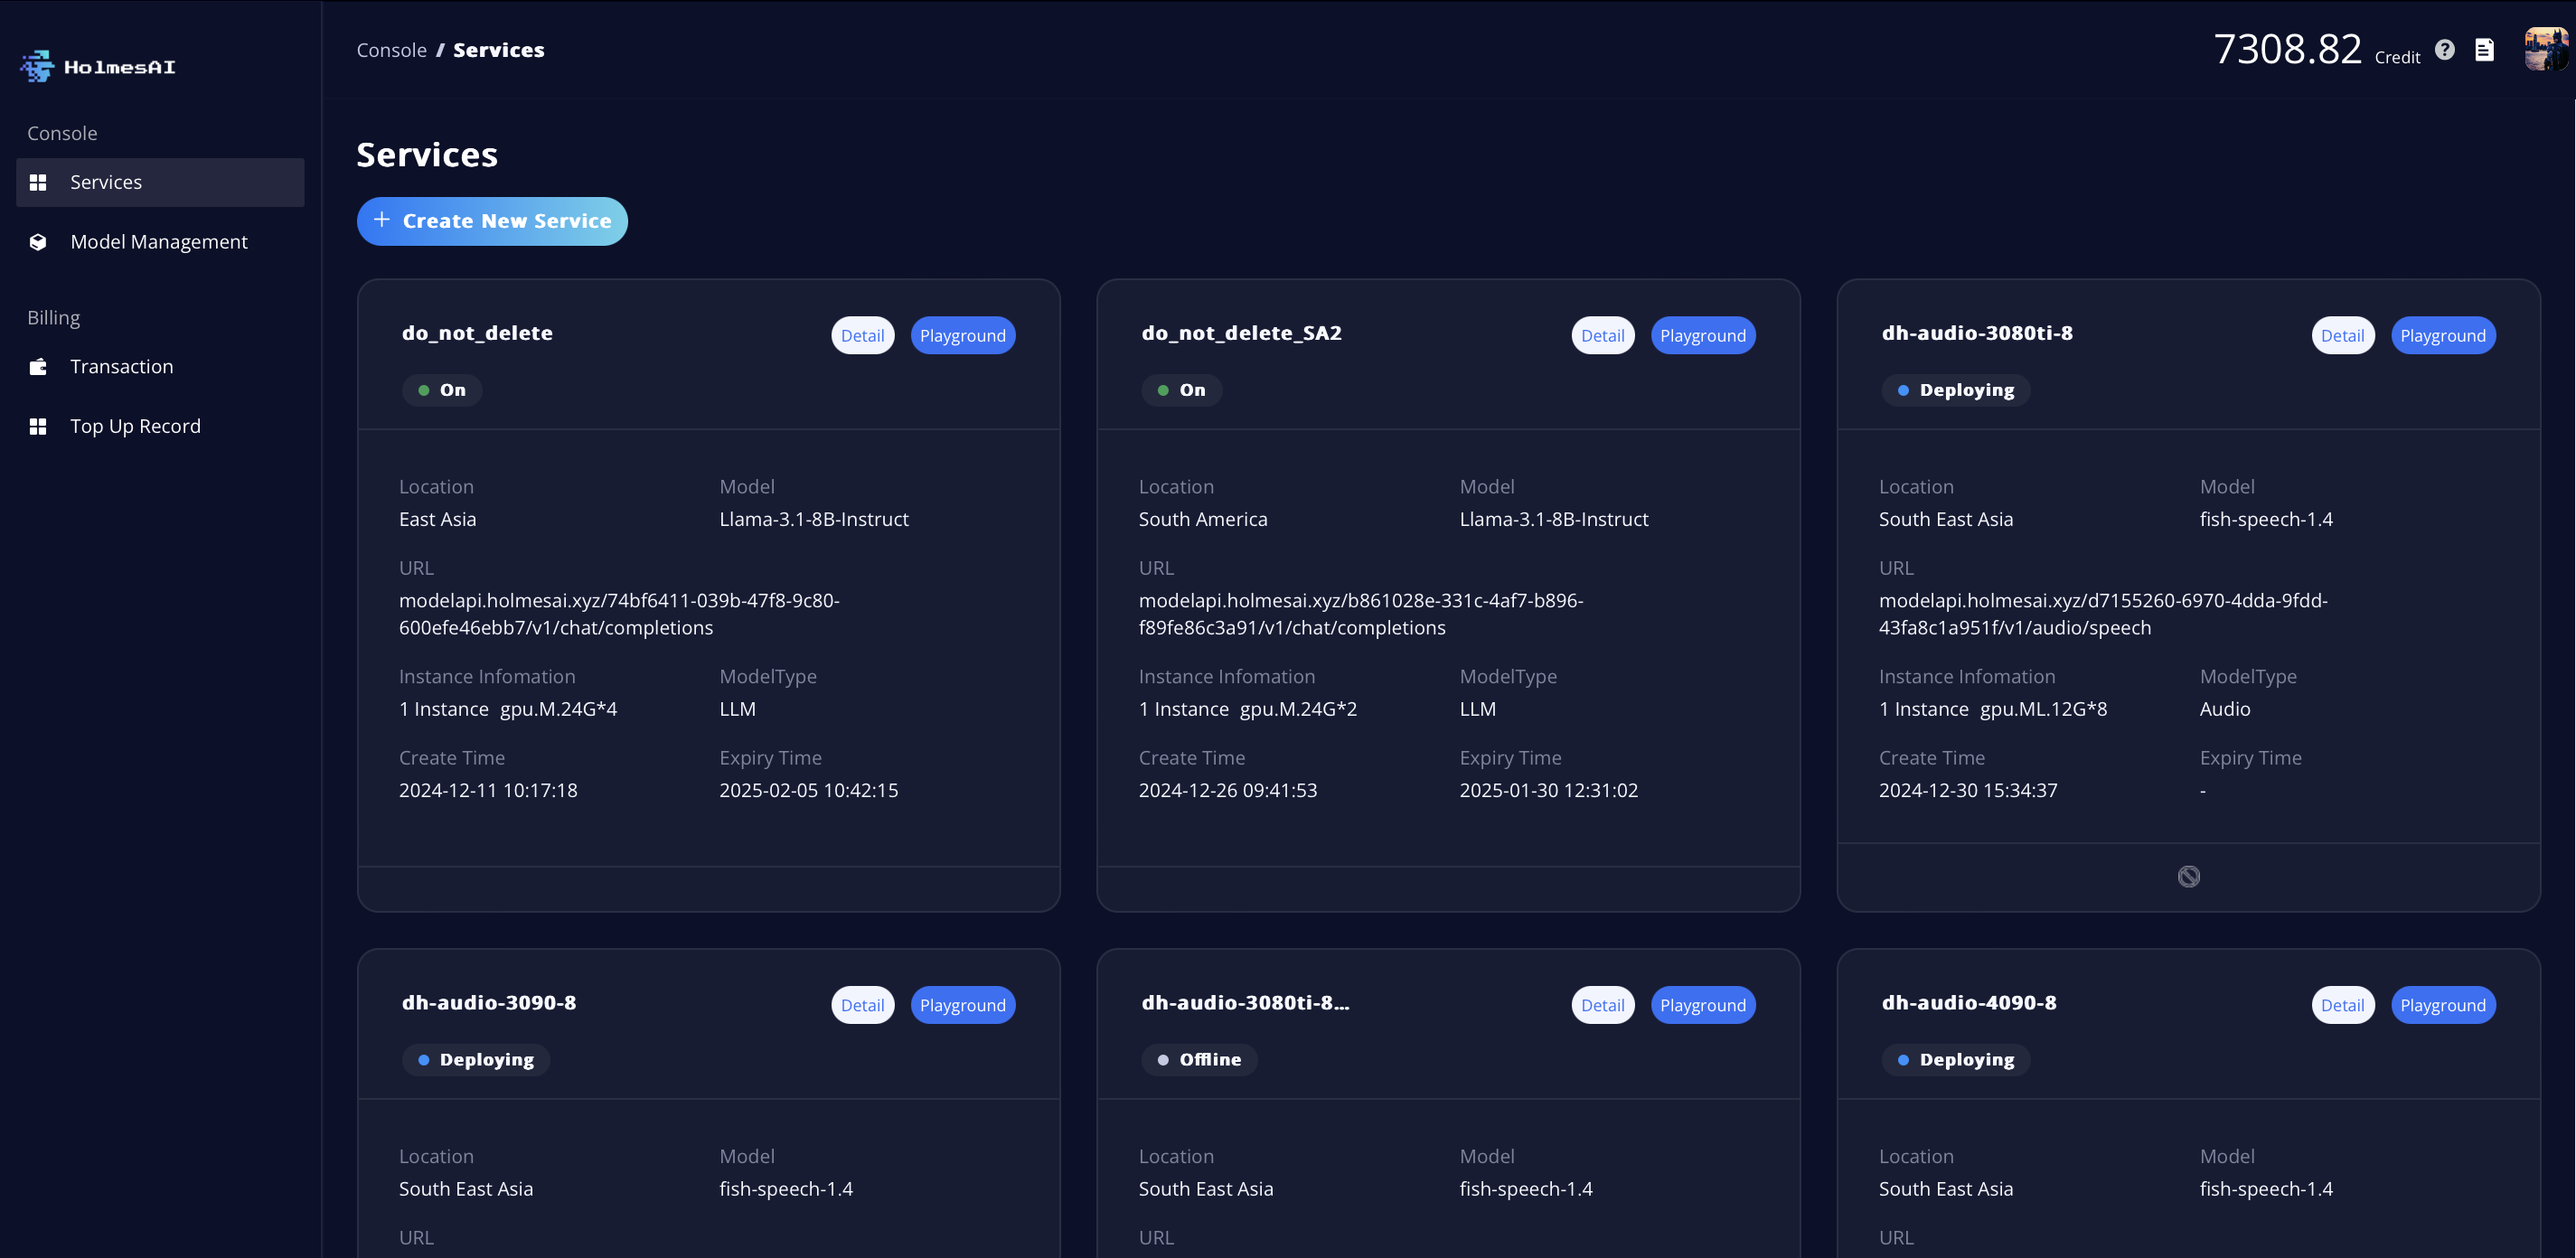
- Once you’ve successfully created a service, you will be directed to the Service Dashboard, where you can monitor the status of each service you’ve created.
- There are four types of status displayed under the service name: Deploying, On, Offline, and Expired.
- To manage your services, click the ban/delete button at the bottom center of the service card. From there, you can either take an online service offline or delete an offline service.
Service Detail
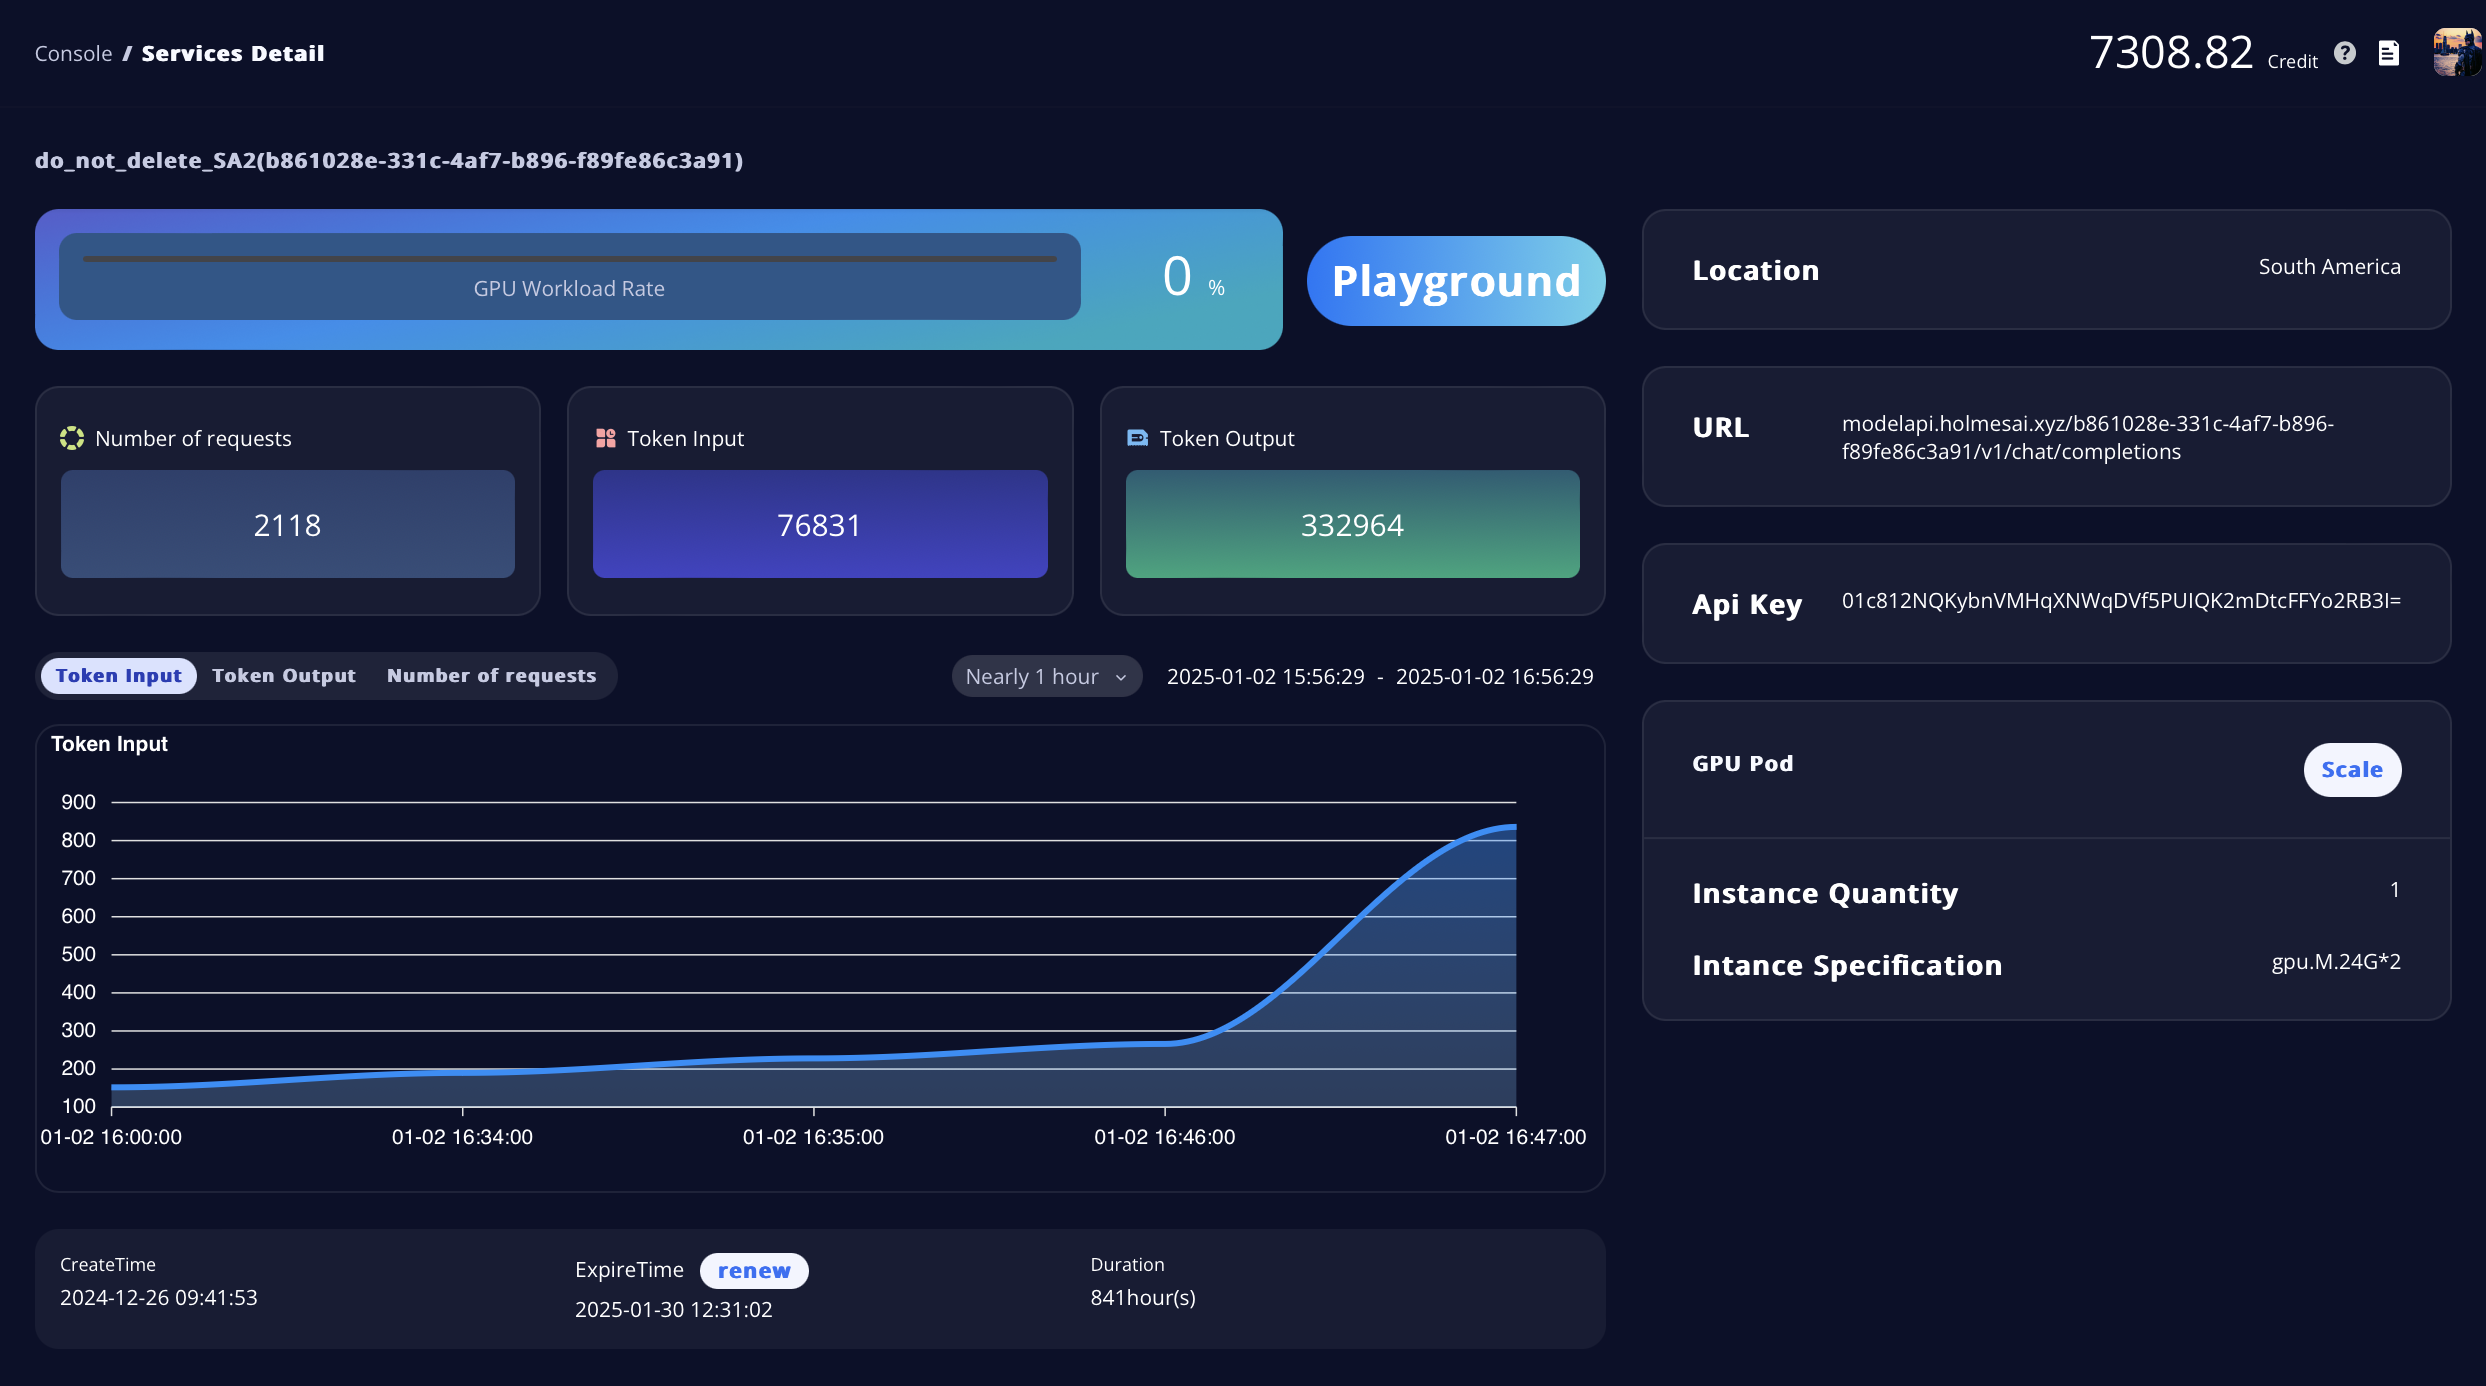
- Click the Detail button at the top right corner of each service card to navigate to the Service Detail page. Here, you can check the GPU Workload Rate and other key performance metrics.
- At the bottom, you can view the service duration and renew your current plan by clicking the Renew button.
Scale your Service
- You can view the current GPU Pod of the service and decide whether to scale the service up or down. (Keep in mind that the GPU Workload Rate is a key reference when making this decision.)
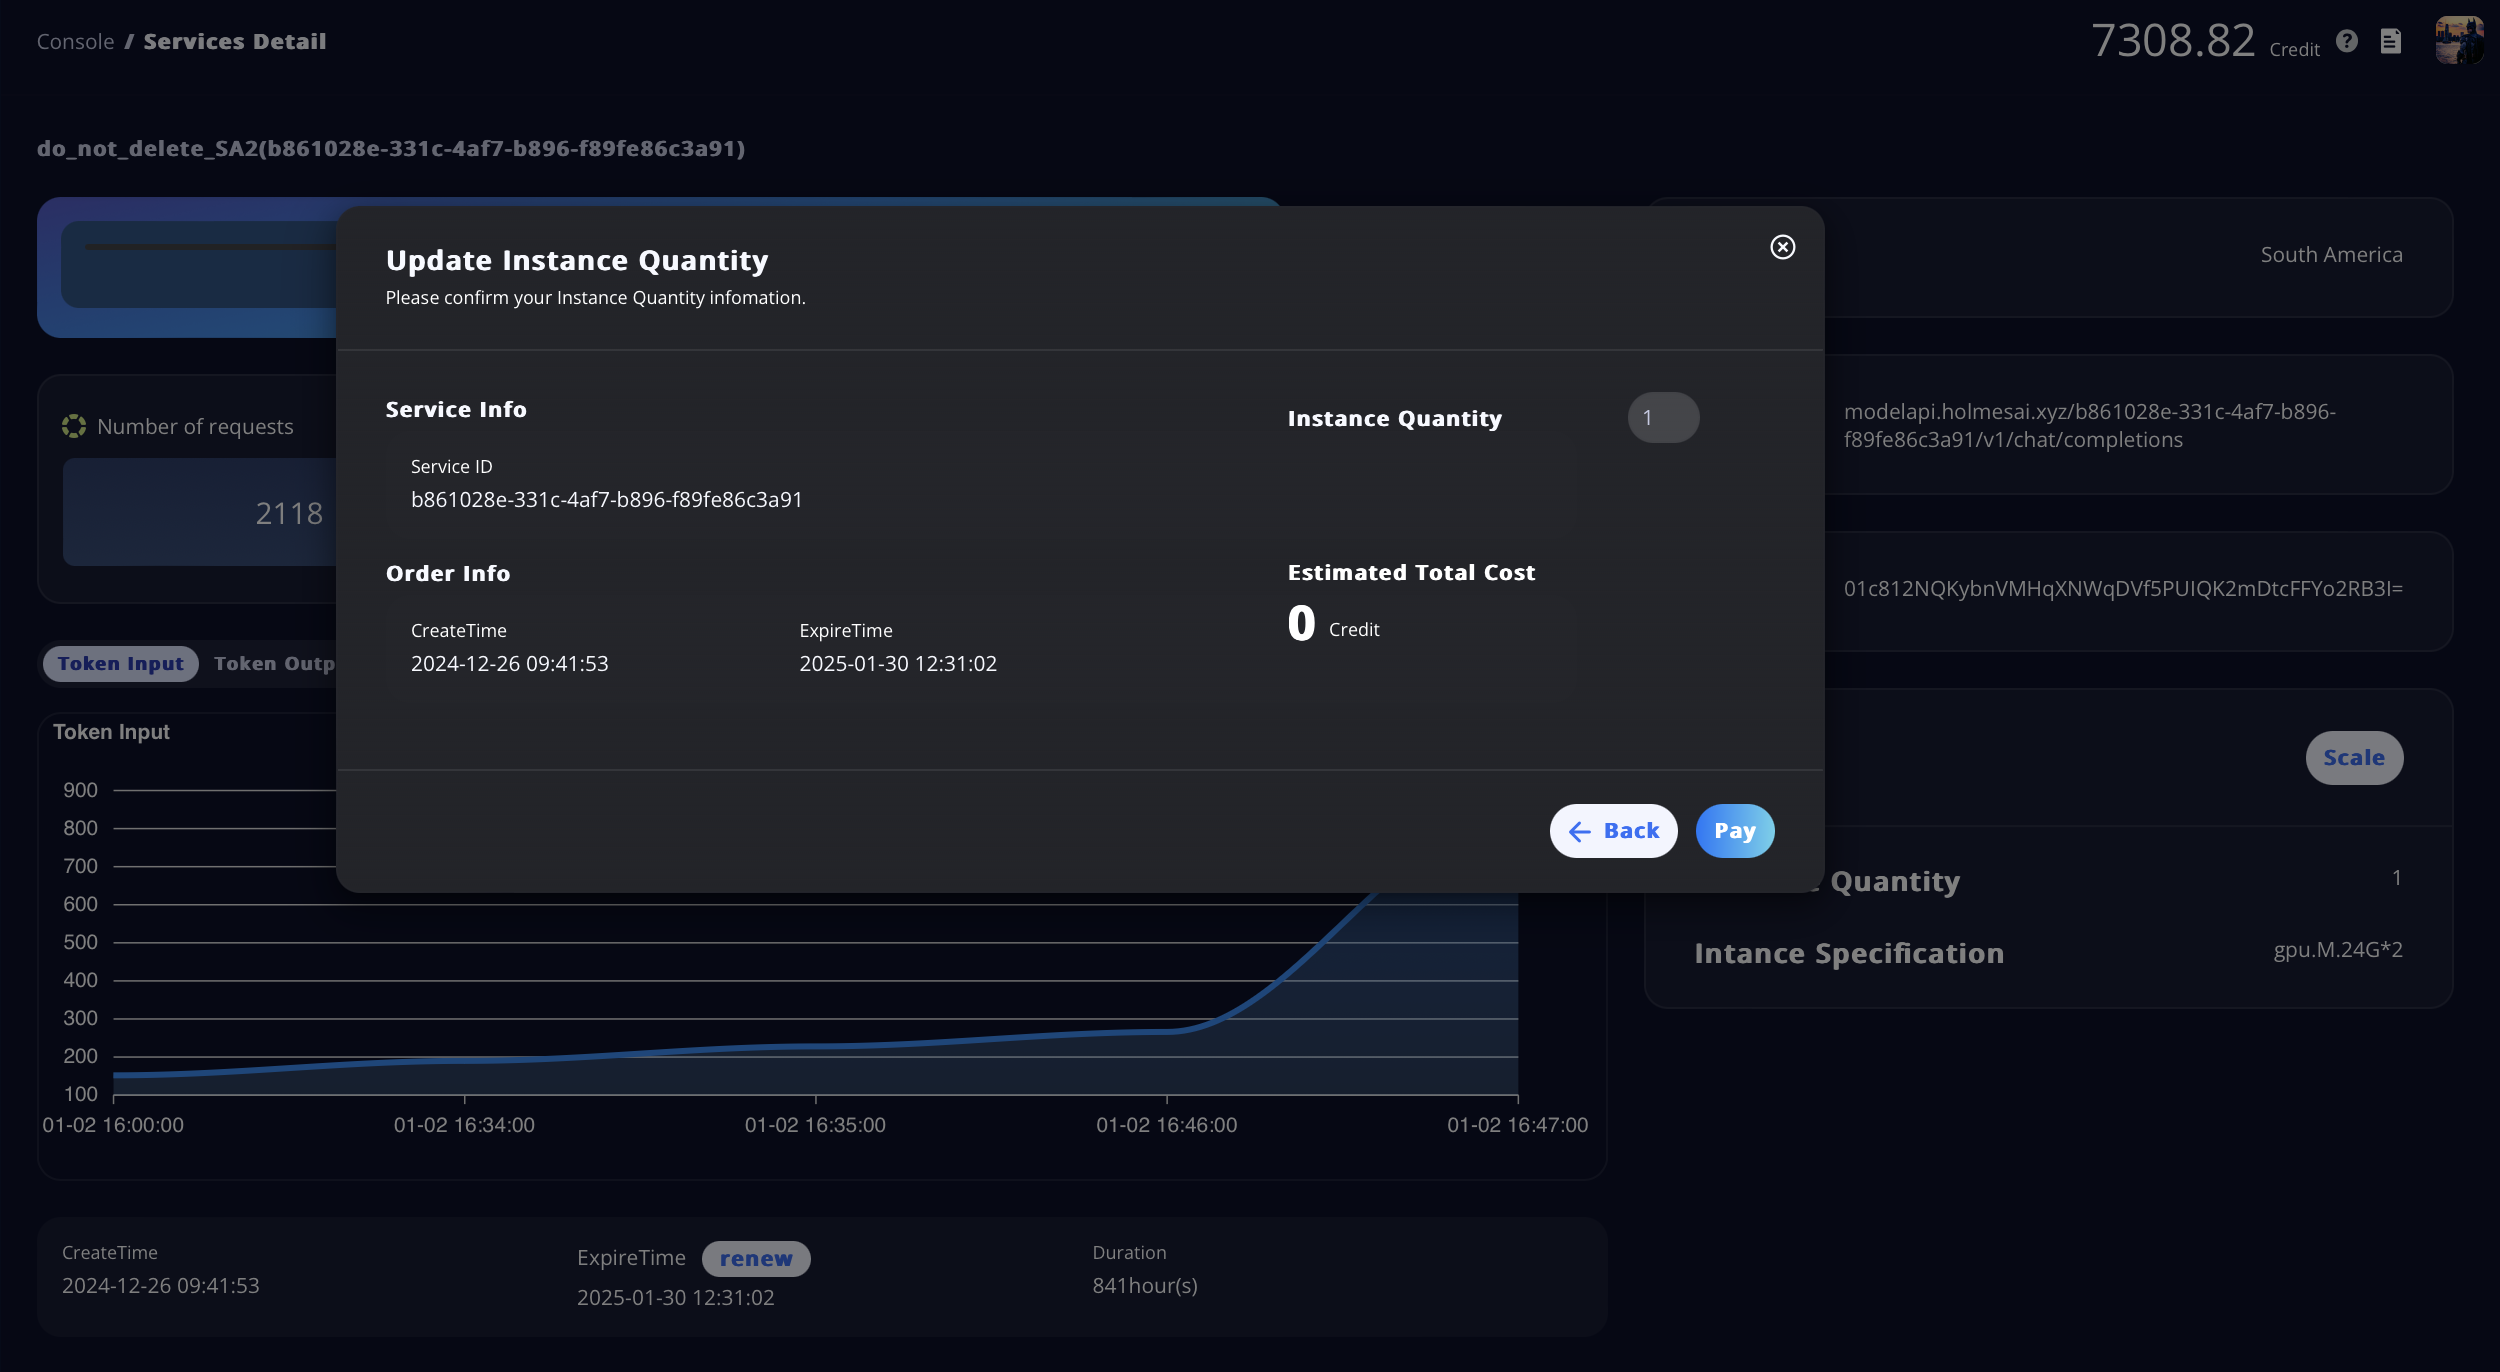
- Click the Scale button to adjust the Instance Quantity by entering the desired number. After confirming the scale-up or scale-down, you will either pay or receive a refund, depending on your changes.
Model Playground
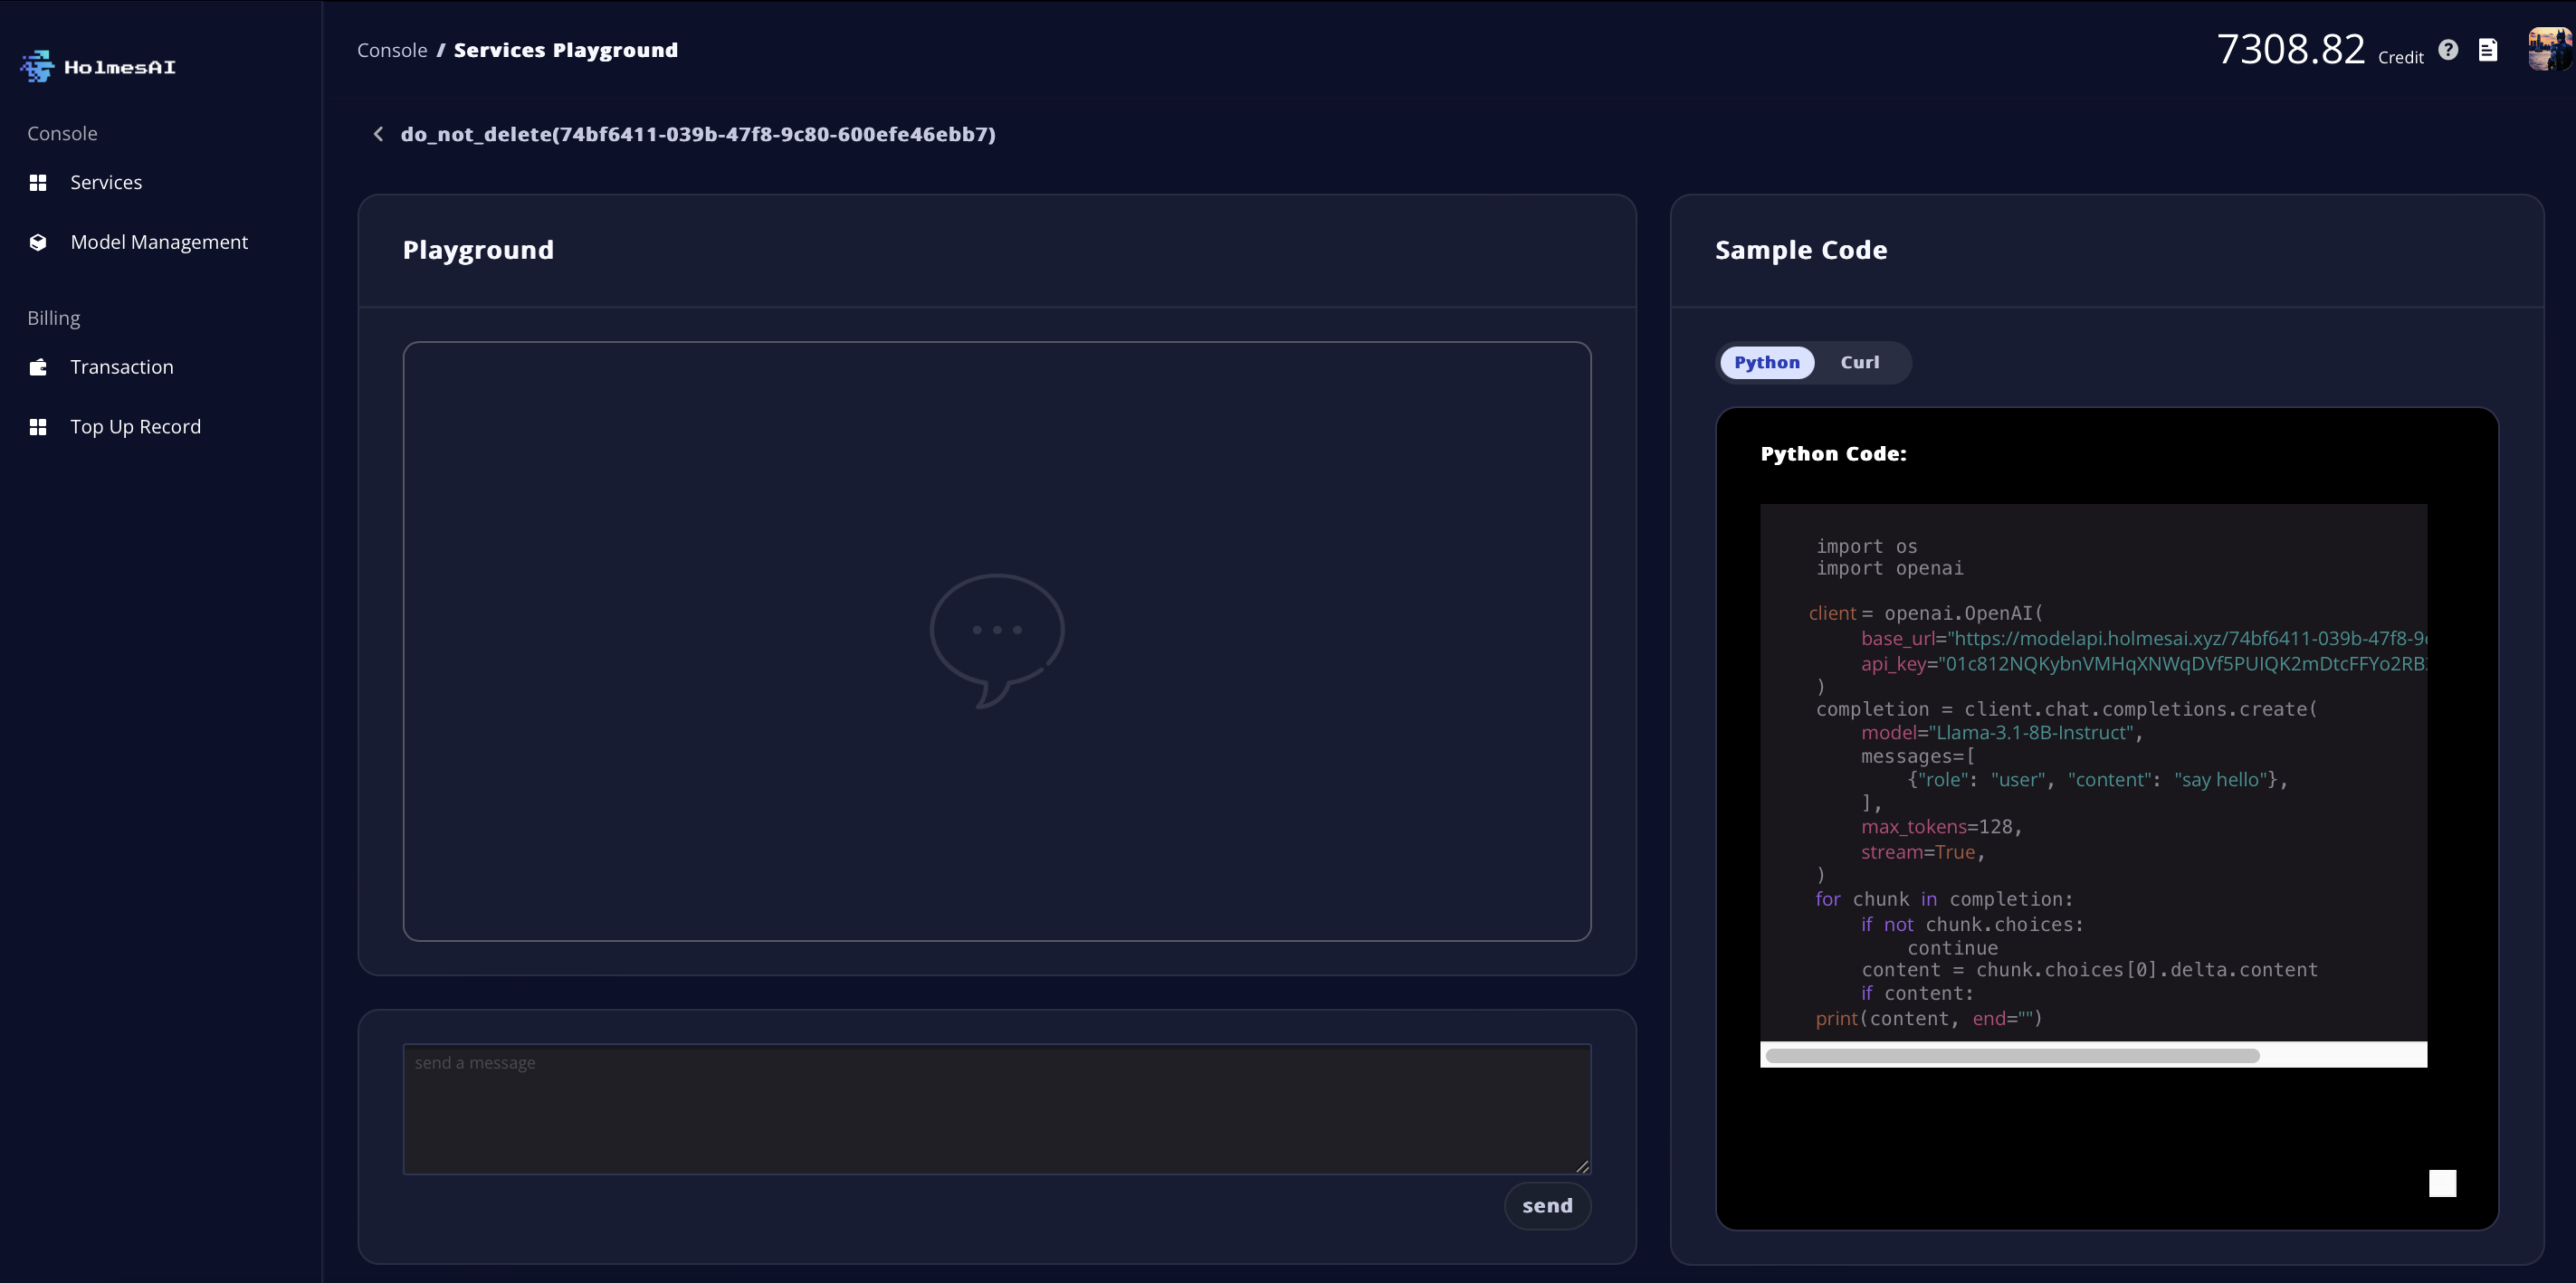
- There are two ways to access the Playground page: Through the Playground button on each service card in the dashboard, or through the Playground button displayed next to the GPU Workload Rate on the Service Details page.
- Once in the Playground, you can interact with the model by typing in the chat box at the bottom left.
- Sample code is displayed on the right for your reference.
